When you add and delete rows in UI-Grid it can be a bit jumpy.
All of a sudden, rows get shifted around and you’re not sure where you were.
It’s like dropping a book on the ground and losing your place:
Where the hell was I?
In this post we’ll explore how to add animations to grid row operations to visually demonstrate what’s happening. The user should be able to tell what rows have just been added, and what rows are being removed.
Animating with CSS
CSS animations have been around a while. You might have used them on your own projects. If you haven’t, check out a couple links to see them in action.
In case you’re unfamiliar with the idea, animating with CSS offloads the hard work to the browser, which can optimize the operations and keep things looking smooth.
Animations also allow visual continuity. As the Google Material Design docs say:
Transitioning between two visual states should be clear, smooth, and effortless. A well-designed transition tells the user where to focus their attention.
Angular provides a module called ngAnimate which will automatically animate elements in
directives like ng-repeat, ng-if, and ng-show if you provide the
right CSS classes. Read about that in the Angular
docs.
The Problem
Unfortunately there’s a problem when we want to use animations in UI-Grid. Because the grid’s content is virtualized, we are not adding and deleting DOM elements in a way that Angular can automatically manage.
Virtualization means that instead of rendering every row in your data set, the grid only renders what would be visible on the screen, plus a little bit extra as a hedge. Everything else is just wide empty space that you don’t see because you’re basically looking through a window at your data.
The Solution
To sum up so far, we fake having a big old data set on your screen, which means we can’t use the standard and easy animation method. How do we do the animations then? Fake them as well.
Angular’s $animate service
provides us with several methods for manually triggering animations. We’ll use
two: addClass and removeClass. When you call these on an element Angular will
apply some extra classes you can set up with CSS transitions.
We will fake the rows appearing and disappearing by watching for the data to change from within code that’s bound to the row. If the rendered row’s data changes to a new row, start the animation.
The animation itself for adding a row will set the row’s opacity to 0 initially, right when the data is changed, then it will transition to full opacity over one second. This will give the appearance of a new row fading in.
Let’s look at the CSS we’ll be using for adding rows:
|
1
2
3
4
5
6
7
8
9
10
11
12
13
14
15
|
.new-row
{
opacity: 0;
}
.new-row-remove {
-webkit-transition: 1s linear all;
-moz-transition: 1s linear all;
-o-transition:1s
linear all;
transition: 1s linear all;
opacity: 0;
}
.new-row-remove-active {
opacity: 1;
}
|
The first class is the one we apply to new rows. We can do this with normal
$elm.addClass('new-row'); this makes the row invisible initially. When we
remove this class with $animate.addClass(element, 'new-row'), however, Angular
will also first add the .new-row-remove class to start the animation, and at the end of the
animation add the .new-row-remove-active class. Angular does this by parsing the styles the
classes apply and pulling out the transition timing information. The result is that the row will
transition from no opacity to full opacity over 1 second.
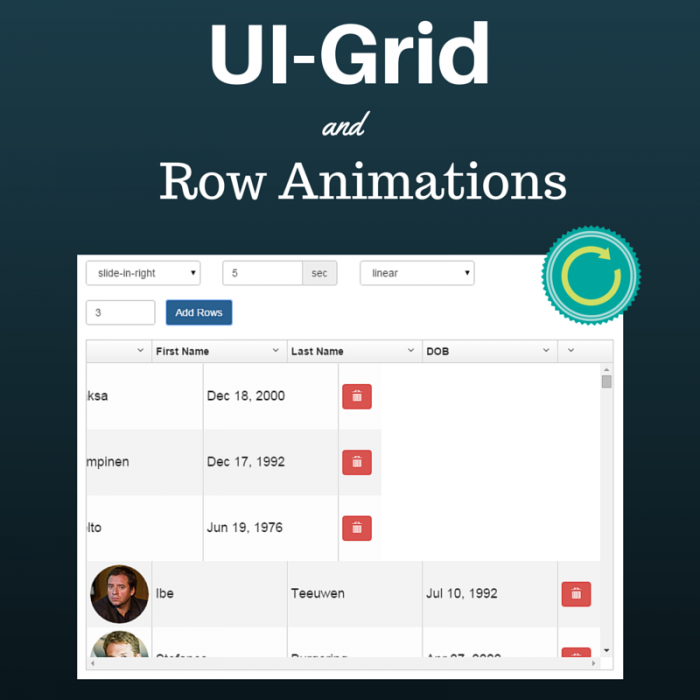
Enough talk, lets see the example:
Example
There’s a bit more here than we’ve talked about, but focus on the end result of clicking the “Add Rows” button. Remember that no elements are being created or destroyed. We’re just altering CSS and the data binding. So the rows appear to shift down, and the new rows appear to fade in. Best of both worlds, right?
Go ahead and play with the other settings. You can make the rows slide in, and alter the timing so it’s slow or fast. You can also change the easing function; see easings.net to see a bunch of different easing types in action.
Code for Adding Rows
We’ve seen the CSS. What about the JS? We said that we’d watch the data bound to the row
and use $animate to change classes. Here’s what that looks like:
|
1
2
3
4
5
6
7
8
9
10
11
12
13
14
15
16
17
18
19
20
21
22
23
24
25
|
// In our
grid options:
onRegisterApi: function
(gridApi) {
gridApi.grid.registerRowBuilder(function
(row, gridOptions)
{
row.isNew
= true;
});
}
.directive('uiGridRow', function ($animate,
$timeout) {
return {
priority:
-1,
link: function ($scope,
$elm, $attrs) {
$scope.$watch('row.entity', function
(n, o)
{
if ($scope.row.isNew)
{
$elm.addClass('new-row');
$timeout(function
() {
$animate.removeClass($elm,
'new-row');
});
$scope.row.isNew
= false;
}
});
}
};
});
|
In our grid options we bind to the grid’s API and register what’s called a Row Builder. Row builders are functions that are executed on rows when they’re created. You can use them to extend row construction as you see fit. Here we just add a flag identifying the row as new.
We are stacking this directive on top of the existing uiGridRow directive. They will both run but ours runs at a lower priority so as not to affect the core directive.
In our link function we simply watch row.entity, which is the element from your dataset
array. When it changed, we see if there’s an isNew property. If so, we add the
new-row class, then remove it with $animate. Finally, we reset the isNew flag
so the animation doesn’t run again during scrolling.
Q: Hey, in your
$watchwhy aren’t you checking to see ifnandoare unequal? Aren’t you running the animations too much?Answer: No, not exactly. Every row initially has the
isNewflag but on the initial$watchexecution the entity hasn’t changed, sonandoare in fact equal. If we don’t allow the animation to run they when new rows are added the animations on ALL the visible rows will run at once, and that looks weird. Visually you don’t see the animations run as the row elements pop in when the grid starts, however.
Animated Row Deletions
The delete button on each row will perform the chosen animation, but backwards. We’ll use the
delete-row class. Here’s the minimum amount of CSS:
|
1
2
3
4
5
6
7
8
9
10
11
|
.delete-row-add {
-webkit-transition: 0.5s linear all;
-moz-transition: 0.5s linear all;
-o-transition: 0.5s linear all;
transition: 0.5s linear all;
opacity: 1;
}
.delete-row-add-active {
opacity: 0;
}
|
So when the delete-row class is added, the row starts at opacity: 1 and over
0.5 seconds, transitions to opacity: 0.
The code for this is a bit different than what we’ve seen so far, however. We have two problems:
- We can’t just remove the row when the button is clicked. We have to wait for the animation to
run, THEN remove the row. Otherwise the row will just pop out of existence. The
removeClassmethod returns a promise that is resolved after the animation completes so we can use that perform the removal. - The scope isolation within the delete button’s grid cell prevents us from having access to our
custom
uiGridRowdirective. We will need to emit an event from the cell that the row listens for.
Let’s see the code. Make sure to pay attention to the comments. They explain how the pieces work together.
|
1
2
3
4
5
6
7
8
9
10
11
12
13
14
15
16
17
18
19
20
21
22
23
24
25
26
27
28
29
30
31
32
33
34
35
36
37
38
39
40
41
42
43
44
|
// Stack
the uiGridCell directive
.directive('uiGridCell', function ()
{
return {
priority:
-1,
link: function ($scope,
$elm, $attrs) {
//
Expose the deleteRow function to the cell scope so our custom template
// can call it
$scope.deleteRow
= deleteRow;
// When
the delete button is clicked, emit a "delete-row" event and pass
// the row as an argument
function deleteRow(row)
{
$scope.$emit('delete-row', row);
}
}
}
})
// In
our stacked uiGridRow directive...
.directive('uiGridRow', function ($animate,
$timeout, uiGridConstants) {
return {
priority:
-1,
link: function ($scope,
$elm, $attrs) {
//
Listen for the above "delete-row" event
$scope.$on('delete-row', function
(evt, row)
{
// Start the animation for removing the row by adding the .delete-row
class
$animate.addClass($elm,
'delete-row')
// ... the animation is done.
.then(function
() {
// Remove the .delete-row class; we don't want any more animations to
run.
$elm.removeClass('delete-row');
// We're not in $digest cycle currently, so we'll initiate a new one with
$timeout.
$timeout(function
() {
// Splice out the row from the data set. This will visually make
it
// look like the rows shift up.
var data = $scope.grid.options.data;
data.splice(data.indexOf(row.entity), 1);
});
});
});
}
}
});
|
That’s a bunch of lines but it gets us what we want. If you haven’t yet, check out deleting rows in the example above.
The rows fade or slide out and then the data shifts up. You’d never know the DOM elements were staying right where they are!
Where to Go From Here
What else can you do with animations, either in UI-Grid or your app? How can you help your users by providing meaningful transitions? What common operations do they (or you) find confusing?
Perhaps you could animate popping up modals, or filtering. Maybe transitions between sections of your application, or interactions with buttons, checkboxes and other elements. The sky’s the limit! Check out the Angular Material Demos to see how Google is encouraging the use of animations in web and mobile applications.
If you have any questions, please feel free to pop them in the comments below. I always respond as soon as I can. Also, for general UI-Grid talk join us on Gitter in the UI-Grid chat room. See you there!